Changing the Key Switches in a Kinesis Advantage 2 Keyboard
Why?
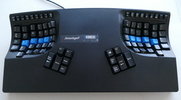
Kinesis only sells the Kinesis Advantage2 keyboard with Cherry Brown or Cherry Red key switches. The Browns are fairly good, but I prefer Cherry Blue key switches. I've done this previously with a Kinesis Advantage, I wanted to document it more thoroughly this time as I went through the process with a Kinesis Advantage2. You could of course use any Cherry-compatible switch, any colour. Be warned that the process is expensive and time-consuming. Photos of the process near the end of the page (if you're going to do this, go through the photos as well: there are some added notes). It's also possible to do this to an existing keyboard by desoldering the whole assembly: that's what I did previously, but I don't recommend it. If you've spent the bucks on the Advantage2 and are willing to fork over $100CA for Cherry key switches to populate it, spend the ~$50US to get the Kinesis key well kit.
UPDATE 2020-04: I paid $50US for the keywell kit, but Kinesis is now charging $100US. Doubling the price is a bit harsh, but honestly I'd be quite willing to pay it if I do the project again.
(Prices are quoted in both US and Canadian dollars - as I paid them.)
What You'll Need
If you're serious about this, you should probably also read my blog entry on the planning phase.
| Item | Price | Notes |
|---|---|---|
| Kinesis Advantage 2 keyboard | $565CA | Price includes tax and shipping from ergocanada who I highly recommend. Kinesis recommends them for Canadian buyers, and I've dealt with them at least a couple times. |
| Kinesis Advantage 2 keywell kit | ~$50US | Price includes tax and shipping, must be ordered direct from Kinesis |
| Kinesis Advantage 2 key cap set | ~$50US | Price includes tax and shipping, must be ordered direct from Kinesis. Not strictly necessary, but it saves you pulling the keycaps out of the existing key wells - I recommend it. |
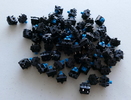
| 70 Cherry Blue key switches (MX1A-E1NW) | $104CA | Price includes diodes (below), plus tax and shipping from Digikey - who I'd also recommend. The key switch type you need is the one with the extra fixing pins. |
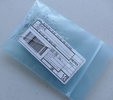
| 100 512-1n914 diodes | ~$3CA, see above | From Digikey. You only need 70, but it's cheaper to buy 100 (at least from Digikey). |
| WASD O-rings | ~$30US | From WASD Keyboards. Optional. |
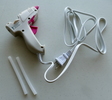
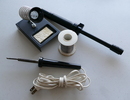
| soldering iron and solder | $25 and up | A cheap one should do for this. |
| Side cutters | $5-$20 | Again, a cheap pair will do. |
| Hot glue gun | Borrow one from a friend - or buy one, they're cheap | |
| Phillips screwdriver | For disassembling and reassembling the keyboard |
Process
This was four to five hours of work for me ... I'm not a fast solderer, but I'm reasonably competent with an iron.
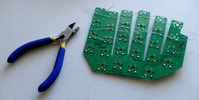
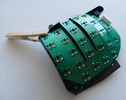
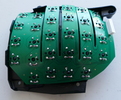
Kinesis buys their key switches in bulk, and that allows them to buy the switches with built-in diodes (the switches have four pins). But consumer-grade Cherry switches don't have diodes built in (they have only two pins), so we have to solder the diodes on ourselves. They need to be on the opposite side of the board from the key switches because otherwise they would interfere with the positioning of the switches. The diodes are small and the case has a lot of extra space, so this doesn't cause interference with anything else inside the case.
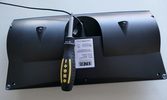
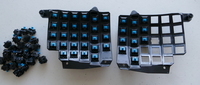
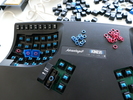
- open the keyboard
- spend a lot of time making sure you know which way around the diodes go
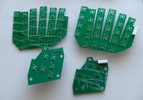
- thread all the new boards with diodes - they go on the side OPPOSITE where the keys will go
- double-check the diodes are correctly oriented
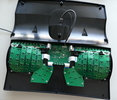
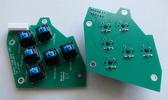
- diodes on thumb pads
- diodes on key wells
- solder the diodes to the boards (if you're out of practice soldering, do the thumb boards first as they're thicker and harder to damage)
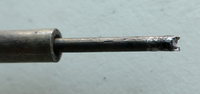
- clip the diode leads (that's why you have side cutters)
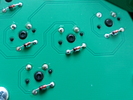
- position the keys in the key wells (do this BEFORE you solder)
- hot glue the keys to the key wells (again, BEFORE you solder)
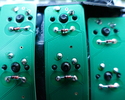
- position the keys on the thumb circuit boards
- solder the keys onto the thumb circuit boards
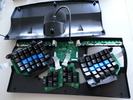
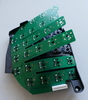
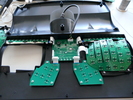
- position the flexible circuit board "hands" over the key wells: the best method seems to be to start from the "base" of the hand and work out to the "fingertips," using clamps, clothes pegs, or the fingers of a trusting friend to hold the board down. As you're bending it, it will tend to spring away from the key leads. You can bend the leads over to try to hold the board in place, but the leads are short enough that this didn't prove reliable. And you may already have bent those leads accidentally: don't break them by bending them too often.
- attach ribbon cables to boards
- position key wells and thumb boards in the case and screw them in
- lock down the other ends of the ribbon cables
- close (but don't screw shut) the case
- plug the keyboard into your computer and test every single key - 'xev' is your friend if you use Linux
- I was 100% on the key wells, but it was at this point that I noticed that nothing on either of the thumb boards worked. On pulling the back off the case again, it was pointed out to me that I'd seated the key switches ... but never soldered any of them.
- if you have non-working switches, examine the soldering very carefully. A bad joint is usually to blame, resolder as needed
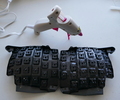
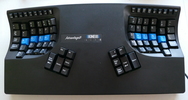
- when all keys are working, add the key caps (with o-rings, if you're using them)
- screw the case shut
 |
 |
 |
 |
 |
 |
 |
 |
 |
 |
 |
 |
 |
 |
 |
 |
 |
 |
 |
 |
 |
 |
 |
 |
 |
Bibliography
To help you decide which key style you want and where to order them:
- An introduction to Cherry MX mechanical switches - the best intro I've found
- Also useful (particularly for part numbers): Wikipedia on Cherry switches